Zitat von
Coeros am April 9, 2025, 10:53 am Uhr
Hello everyone, I would like to share with you some experiences about silicone doll repair, including the materials needed for repair, small tears, large tears and finger repair, hoping to help friends who have the same confusion.
The following are the specific contents:
The reasons to own a silicone doll are infinite. Some use it solely as a toy, or masturbation device while others form a close bond with their doll. No matter what applies to you, they all have one thing in common: a fundamental interest in protecting the doll from damage. After all, damage can have devastating effects.
In addition to appearance, functionality can also be affected. Tears in the surface not only look unsightly, they can cause additional damage due to unwanted moisture penetration. Mold and corrosion / rust on the skeleton are the result.
Dolls made of silicone are much more robust and durable than those made of TPE, so repairing them is also a bit more intensive. But don’t worry, this article will help you repair damage to your silicone doll. With the right supplies, repair is possible for anyone, regardless of their personal level of repair experience.
Preparation and material
The glue used here is Sil-Poxy. It is a one-component adhesive specifically designed to bond silicone rubbers together. Sil-Poxy provides a strong, flexible bond with high elongation at break.
OPTIONAL: There are two or three other silicone adhesives on the market that are also suitable. However, my preference is Sil-Poxy.
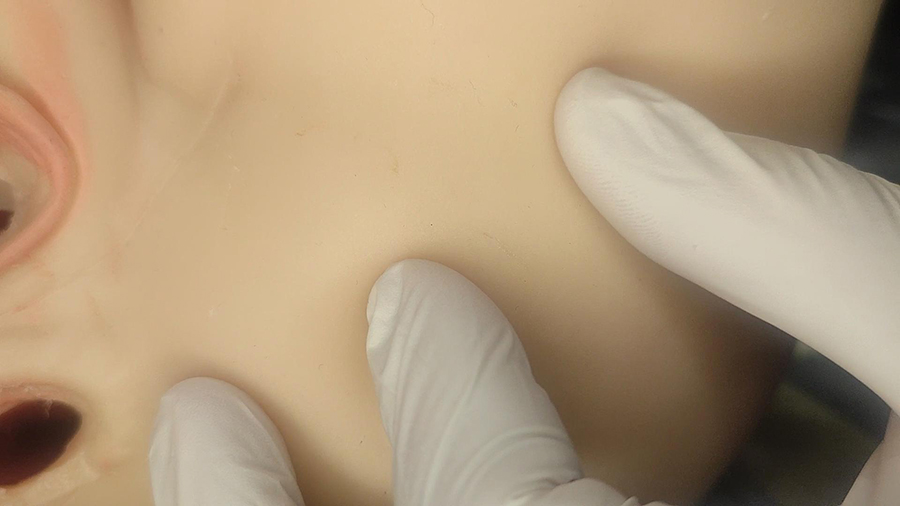
Before you start the repair, you should thoroughly clean the affected area. To clean the surface of a silicone doll, I recommend a soap with a neutral PH value first, which has a disinfecting effect and contains as few additives as possible. Then follow up by sanitizing the area with Isopropyl alcohol that is at least 80% alcohol.
For cleaning I use Absorbent Suede Towe. For drying, I also use Microfiber Drying Towel.
In this article, I explain the repair using the following examples:
- Small cuts and tears in the skin – a common damage.
- Large cracks
- Repair of fingers when wire or the joints pierce the surface.
- Detached parts
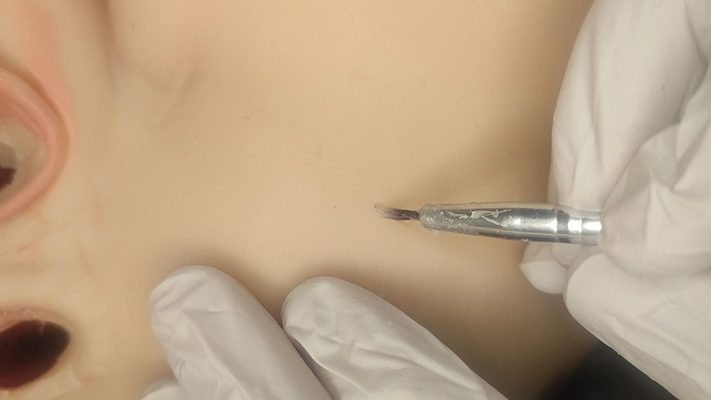
Sil-Poxy is available in-store and online retailers; it is my primary choice when it comes to repairing silicone dolls. The difficulty with gluing silicone is that silicone only bonds with other silicones. Thus, normal glues are completely useless. I use multiple applications of Sil-Poxy to build up layers because the damage, especially to the fingers, is so extensive that a multi-layer buildup of the material is necessary. This leads to a coarser result than with a single layer of Sil-Poxy, for example. I accept this, however, because the sex doll’s fingers are so extensively damaged that I can’t repair them any other way. A flat toothpick or a thin metal serum spatula is recommended for application.
Note on Sil-Poxy and its processing: Sil-Poxy hardens when exposed to oxygen and should be applied quickly. The result is an extremely stable, durable yet flexible surface.
I recommend that only small amounts be applied at a time and that the lid be closed again so that the material does not harden in the container. Furthermore, skin contact should be avoided. Wearing disposable gloves is highly recommended. Always work in well-ventilated areas to avoid respiratory damage due to the unsafe vapors.
Small Tears

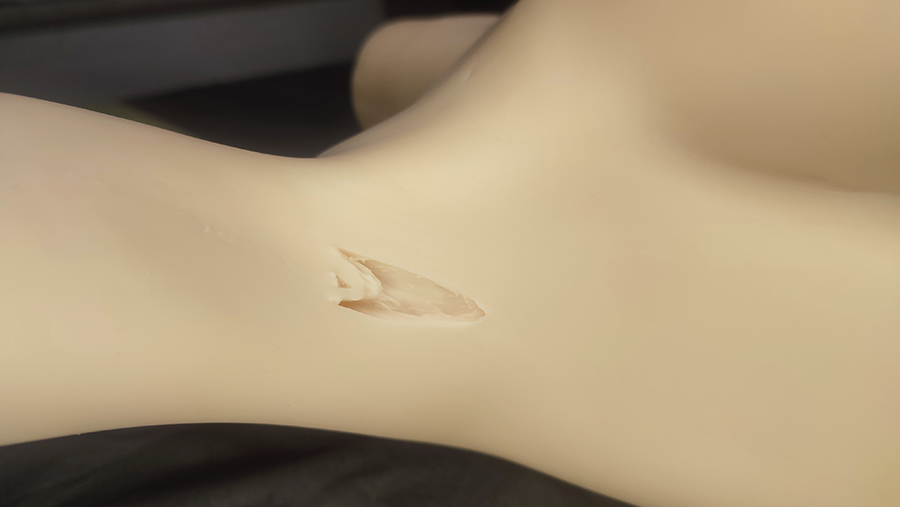
In this example, the silicone doll had about a 1.5cm small tear, on the underside of the left buttocks.
Make sure the area is clean, and that the silicone doll is in a neutral and non-compression stressed position before applying Sil-Poxy into the tear.
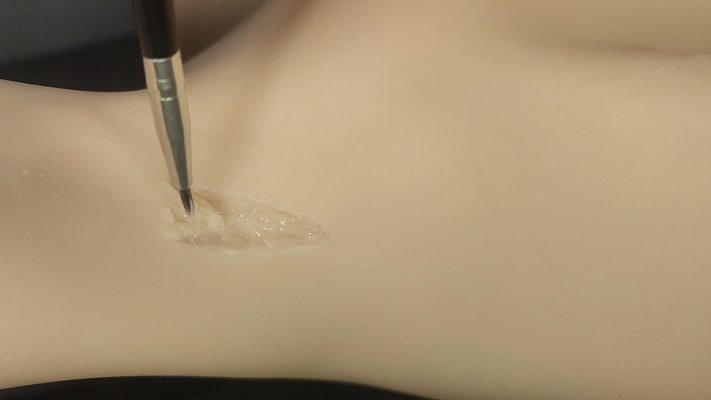
Press the two sides together and wait briefly for the Sil-Poxy to begin to bond together. If necessary, keep the site pressed together until it stays together on its own. This can take up to 5 minutes. Depending on whether the spot is under constant tension, this process may require multiple layers for stronger durability. The repair is now basically complete. To make the surface further damage resistant, you can apply a thin layer of Sil-Poxy to the opening of the tear.
Large Tears
While you can restore the appearance of small tears, larger tears are all about damage control. Often, these tears occur under the arms or at the transition between buttocks and thighs.
The danger with larger tears is, on one hand, moisture and dirt can get inside the silicone doll through the resulting gaps. In addition to mold, moisture can also lead to corrosion and rusting of the skeleton, causing premature breakdown. In this way, you can ruin an expensive doll very quickly.
Apply the Sil-Poxy generously inside the tear and make sure to smooth the entire edge. If necessary, this process can be repeated once or twice. In this way, the tear cannot spread any further. In addition, the additional layer prevents the penetration of dirt and moisture.
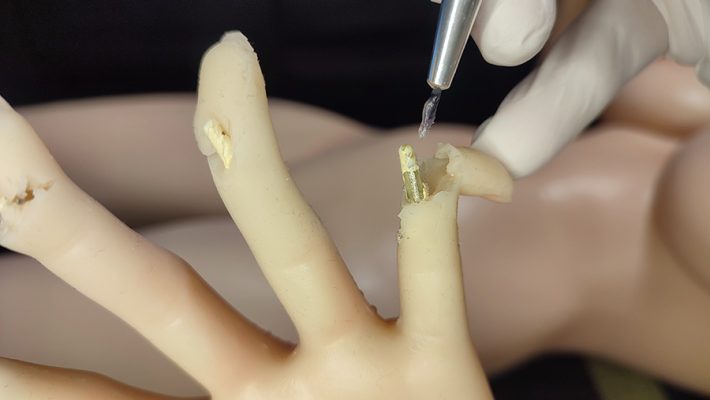
Repair of fingers
The repair of fingers is similar to the repair of tears. Again, the surface must be CLEAN and you gently press the damaged areas together after application until the Sil-Poxy bonds. If, as in my example, the fingers are very small and the parts to be glued are also very small and loose, work your way forward step by step starting at the inner-most area of the damage and working outward. Thorough work is advisable, especially on the fingers.
I also applied a thin layer of Vaseline to the joints of my fingers. This prevents the finger joints from sticking to the inside of the skin. This would render the fingers immobile and the skin would tear when trying to move the fingers.
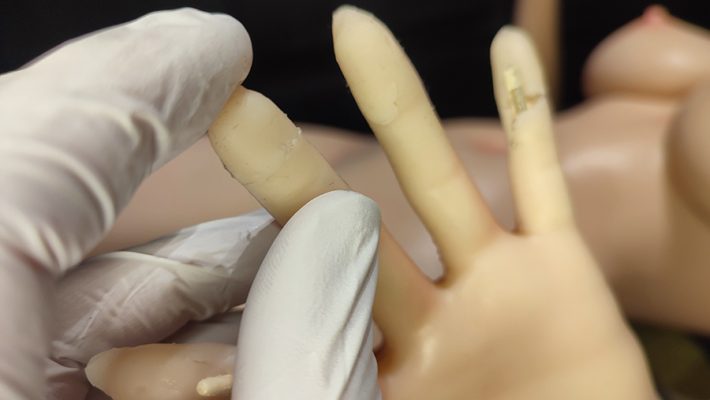
Since the fingers are used a lot, I recommend applying a second layer. As you can see in the pictures, you can see clear traces of the repair on some fingers. In my case, this was due to the additional layers of Sil-Poxy and because it was important to me that the fingers are highly stable again.
Therefore, some fingers certainly no longer win a beauty contest, but everything is now stable and the formerly damaged fingers are now back in order. With thinly applied layers of Sil-Poxy, the result is clearly more aesthetic.
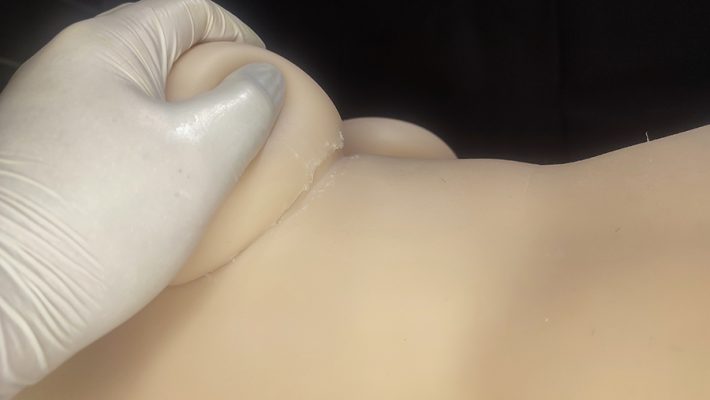
Severed parts
The poor silicone doll’s right breast was almost torn off. Thankfully, this too can also be repaired. Carefully clean the surface to be glued. After applying Sil-Poxy on both sides, you need to place the separated part as accurately as possible. Depending on the extent of the damage, you may need to hold it longer or find a way to keep the part to be glued immobilized and well-fitted.
The breast could be completely closed again with the repair and fortunately you can only see the glue site when you lift the breast.
Care
You don’t need to pay attention to anything else when caring for your silicone doll. Clean and powder your silicone doll as usual, watch out for minor damages and repair them early. Then you will enjoy your silicone doll for a long time.
In this article I am repairing an IROKEBIJIN 147 with the Akane head. This silicone doll had suffered severe damage during shipping. Additionally, it received further damage when it was sent to a large logistics company for damage control. It then sat in a corner in a department store for another three weeks until it was finally returned. The manufacturer had arranged for a replacement in the meantime (high praise to the unbureaucratic handling on the part of IROKEBIJIN), but I didn’t have the heart to just throw the silicone sex doll in the trash.
Hello everyone, I would like to share with you some experiences about silicone doll repair, including the materials needed for repair, small tears, large tears and finger repair, hoping to help friends who have the same confusion.
The following are the specific contents:
The reasons to own a silicone doll are infinite. Some use it solely as a toy, or masturbation device while others form a close bond with their doll. No matter what applies to you, they all have one thing in common: a fundamental interest in protecting the doll from damage. After all, damage can have devastating effects.
In addition to appearance, functionality can also be affected. Tears in the surface not only look unsightly, they can cause additional damage due to unwanted moisture penetration. Mold and corrosion / rust on the skeleton are the result.
Dolls made of silicone are much more robust and durable than those made of TPE, so repairing them is also a bit more intensive. But don’t worry, this article will help you repair damage to your silicone doll. With the right supplies, repair is possible for anyone, regardless of their personal level of repair experience.
Preparation and material
The glue used here is Sil-Poxy. It is a one-component adhesive specifically designed to bond silicone rubbers together. Sil-Poxy provides a strong, flexible bond with high elongation at break.
OPTIONAL: There are two or three other silicone adhesives on the market that are also suitable. However, my preference is Sil-Poxy.
Before you start the repair, you should thoroughly clean the affected area. To clean the surface of a silicone doll, I recommend a soap with a neutral PH value first, which has a disinfecting effect and contains as few additives as possible. Then follow up by sanitizing the area with Isopropyl alcohol that is at least 80% alcohol.
For cleaning I use Absorbent Suede Towe. For drying, I also use Microfiber Drying Towel.
In this article, I explain the repair using the following examples:
- Small cuts and tears in the skin – a common damage.
- Large cracks
- Repair of fingers when wire or the joints pierce the surface.
- Detached parts
Sil-Poxy is available in-store and online retailers; it is my primary choice when it comes to repairing silicone dolls. The difficulty with gluing silicone is that silicone only bonds with other silicones. Thus, normal glues are completely useless. I use multiple applications of Sil-Poxy to build up layers because the damage, especially to the fingers, is so extensive that a multi-layer buildup of the material is necessary. This leads to a coarser result than with a single layer of Sil-Poxy, for example. I accept this, however, because the sex doll’s fingers are so extensively damaged that I can’t repair them any other way. A flat toothpick or a thin metal serum spatula is recommended for application.
Note on Sil-Poxy and its processing: Sil-Poxy hardens when exposed to oxygen and should be applied quickly. The result is an extremely stable, durable yet flexible surface.
I recommend that only small amounts be applied at a time and that the lid be closed again so that the material does not harden in the container. Furthermore, skin contact should be avoided. Wearing disposable gloves is highly recommended. Always work in well-ventilated areas to avoid respiratory damage due to the unsafe vapors.
Small Tears
In this example, the silicone doll had about a 1.5cm small tear, on the underside of the left buttocks.
Make sure the area is clean, and that the silicone doll is in a neutral and non-compression stressed position before applying Sil-Poxy into the tear.
Press the two sides together and wait briefly for the Sil-Poxy to begin to bond together. If necessary, keep the site pressed together until it stays together on its own. This can take up to 5 minutes. Depending on whether the spot is under constant tension, this process may require multiple layers for stronger durability. The repair is now basically complete. To make the surface further damage resistant, you can apply a thin layer of Sil-Poxy to the opening of the tear.
Large Tears
While you can restore the appearance of small tears, larger tears are all about damage control. Often, these tears occur under the arms or at the transition between buttocks and thighs.
The danger with larger tears is, on one hand, moisture and dirt can get inside the silicone doll through the resulting gaps. In addition to mold, moisture can also lead to corrosion and rusting of the skeleton, causing premature breakdown. In this way, you can ruin an expensive doll very quickly.
Apply the Sil-Poxy generously inside the tear and make sure to smooth the entire edge. If necessary, this process can be repeated once or twice. In this way, the tear cannot spread any further. In addition, the additional layer prevents the penetration of dirt and moisture.
Repair of fingers
The repair of fingers is similar to the repair of tears. Again, the surface must be CLEAN and you gently press the damaged areas together after application until the Sil-Poxy bonds. If, as in my example, the fingers are very small and the parts to be glued are also very small and loose, work your way forward step by step starting at the inner-most area of the damage and working outward. Thorough work is advisable, especially on the fingers.
I also applied a thin layer of Vaseline to the joints of my fingers. This prevents the finger joints from sticking to the inside of the skin. This would render the fingers immobile and the skin would tear when trying to move the fingers.
Since the fingers are used a lot, I recommend applying a second layer. As you can see in the pictures, you can see clear traces of the repair on some fingers. In my case, this was due to the additional layers of Sil-Poxy and because it was important to me that the fingers are highly stable again.
Therefore, some fingers certainly no longer win a beauty contest, but everything is now stable and the formerly damaged fingers are now back in order. With thinly applied layers of Sil-Poxy, the result is clearly more aesthetic.
Severed parts
The poor silicone doll’s right breast was almost torn off. Thankfully, this too can also be repaired. Carefully clean the surface to be glued. After applying Sil-Poxy on both sides, you need to place the separated part as accurately as possible. Depending on the extent of the damage, you may need to hold it longer or find a way to keep the part to be glued immobilized and well-fitted.
The breast could be completely closed again with the repair and fortunately you can only see the glue site when you lift the breast.
Care
You don’t need to pay attention to anything else when caring for your silicone doll. Clean and powder your silicone doll as usual, watch out for minor damages and repair them early. Then you will enjoy your silicone doll for a long time.
In this article I am repairing an IROKEBIJIN 147 with the Akane head. This silicone doll had suffered severe damage during shipping. Additionally, it received further damage when it was sent to a large logistics company for damage control. It then sat in a corner in a department store for another three weeks until it was finally returned. The manufacturer had arranged for a replacement in the meantime (high praise to the unbureaucratic handling on the part of IROKEBIJIN), but I didn’t have the heart to just throw the silicone sex doll in the trash.


") bofa : schönen Freutag euch allen...2025-04-11 07:24:35
bofa : schönen Freutag euch allen...2025-04-11 07:24:35 Racoon : Moin 😇2025-04-11 04:04:33
") lotusalex2000 : schönes Wochenende 😃2025-04-05 09:21:30
lotusalex2000 : schönes Wochenende 😃2025-04-05 09:21:30 2025-03-29 09:37:13
 2025-03-28 04:37:09
") DaiOtaku : Die magische Truhe ist nun bei mir, ich hoffe, dass am Wochenende das Wetter etwas fotofreundlicher ist, dann darf sich meine Truppe da was nettes raussuchen2025-03-27 08:11:27
DaiOtaku : Die magische Truhe ist nun bei mir, ich hoffe, dass am Wochenende das Wetter etwas fotofreundlicher ist, dann darf sich meine Truppe da was nettes raussuchen2025-03-27 08:11:27") Lilith666 : Hallo Lotos, weit weg gewesen?2025-03-22 11:21:22
Lilith666 : Hallo Lotos, weit weg gewesen?2025-03-22 11:21:22 2025-03-16 15:41:30
 2025-03-16 15:13:39
") Dollhausener : Hoch die Hände .... Samstag 😂2025-03-15 07:14:24
Dollhausener : Hoch die Hände .... Samstag 😂2025-03-15 07:14:24


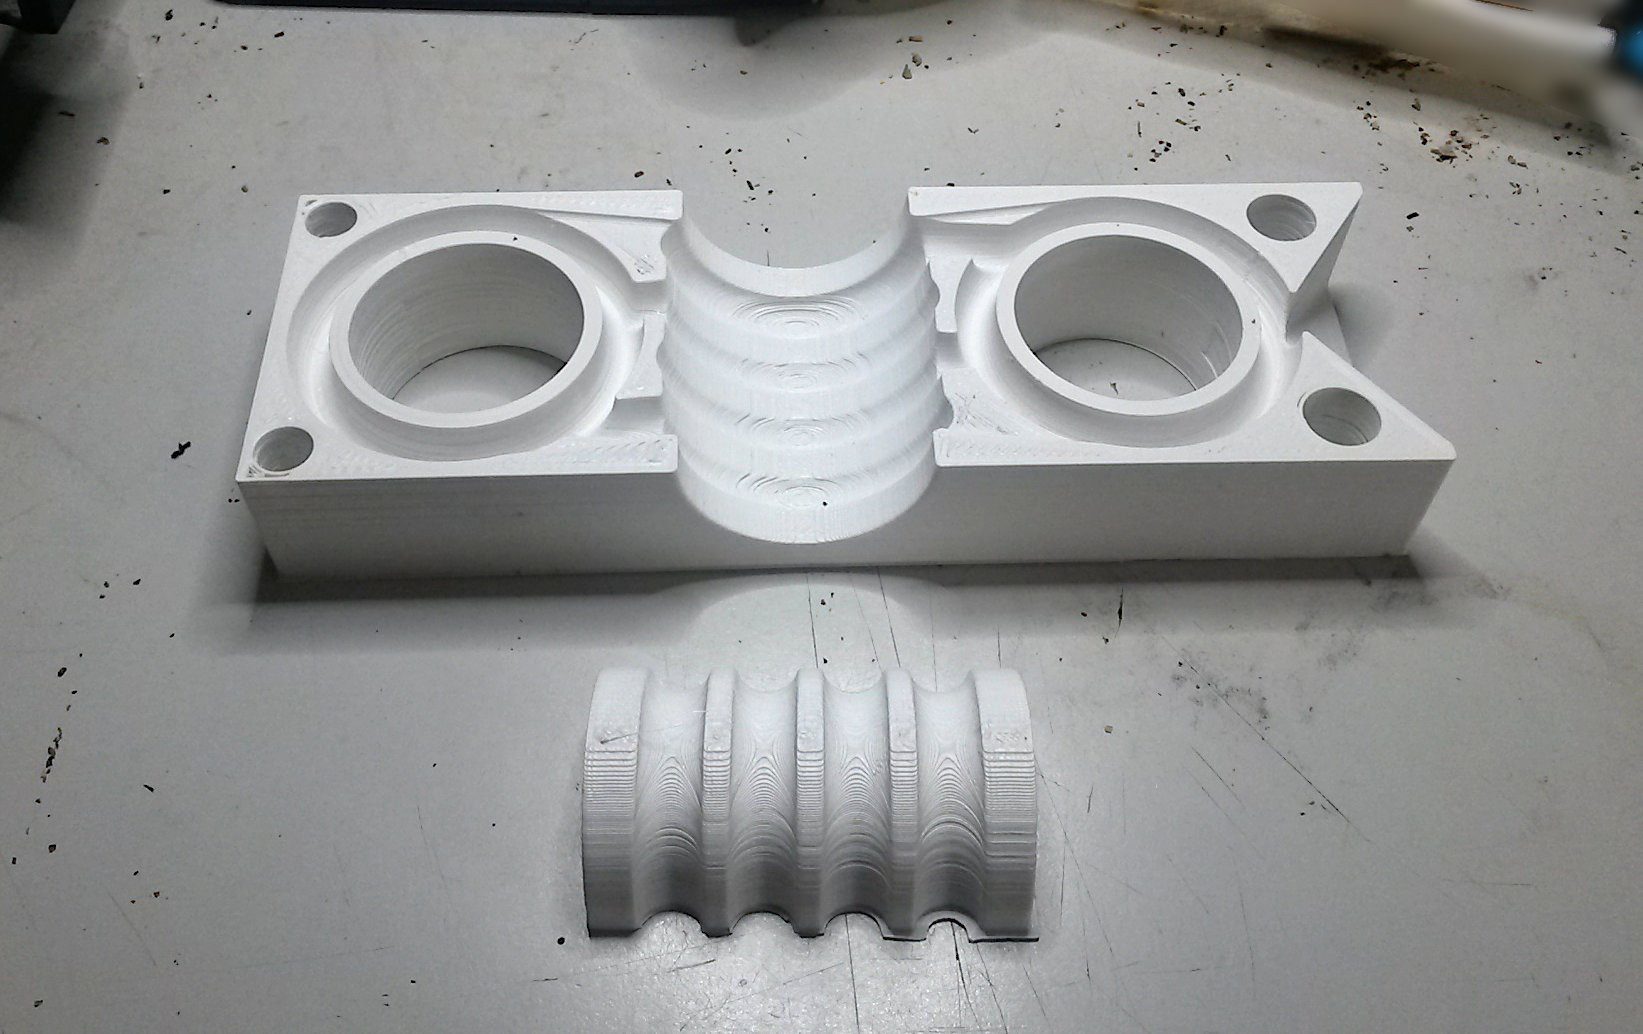


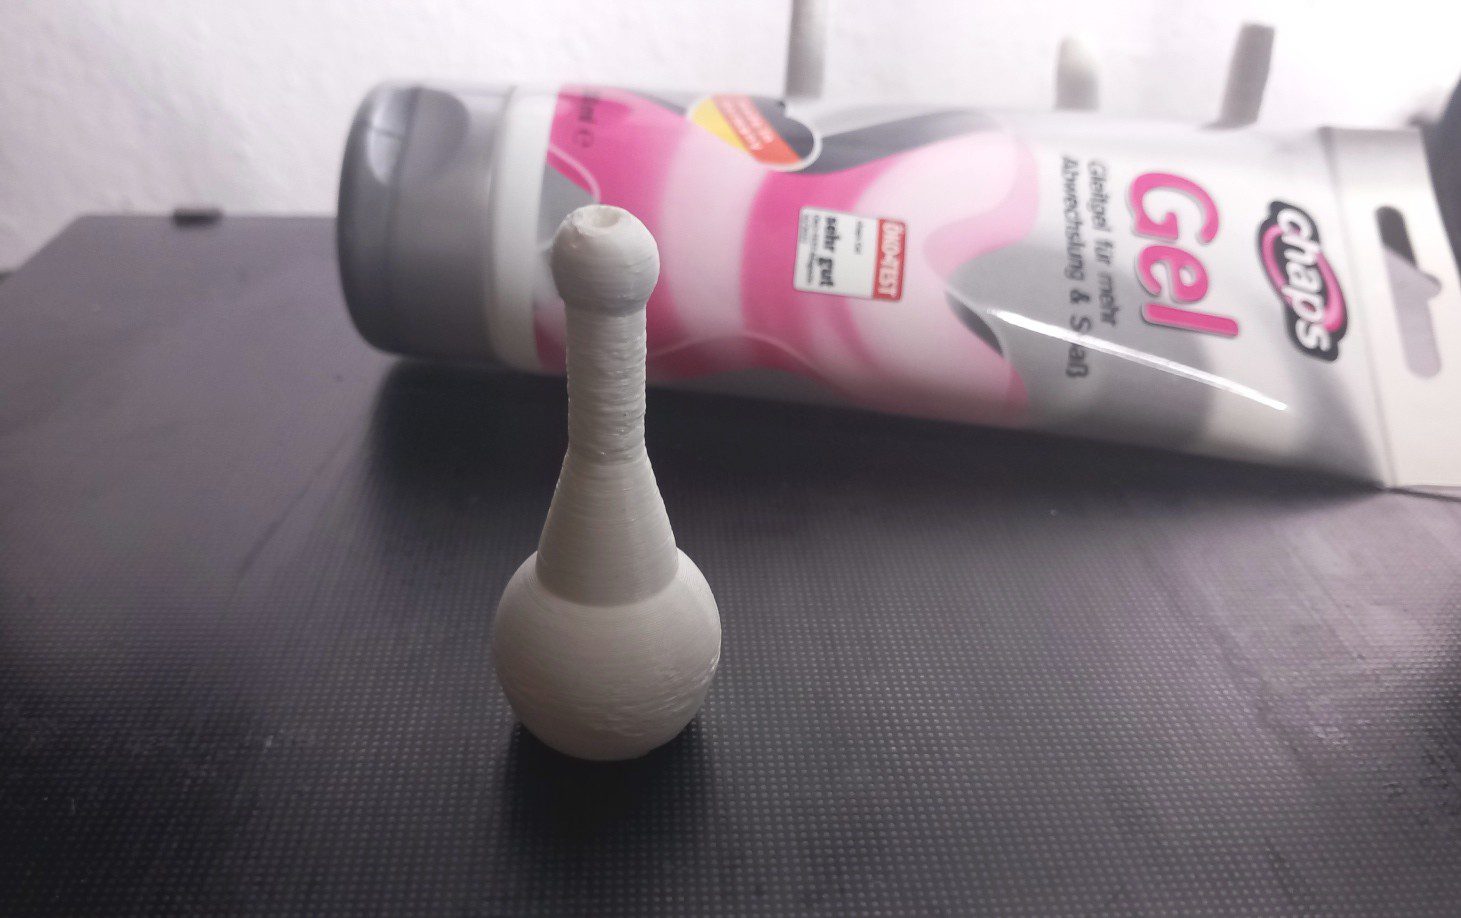


Hier mal der Link zu den Dateien , man braucht aber sehr weiches (teures) TPU. https://cults3d.com/de/modell-3d/gadget/real-doll-lubricant-pipette